Using the Avalanche Wallet
Stake your AVAX and become a validator with at least 2000 AVAX.
Access the Avalanche Wallet
Navigate to Core Web.
The button displayed in your app dashboard opens a modal window displaying the possible staking options.
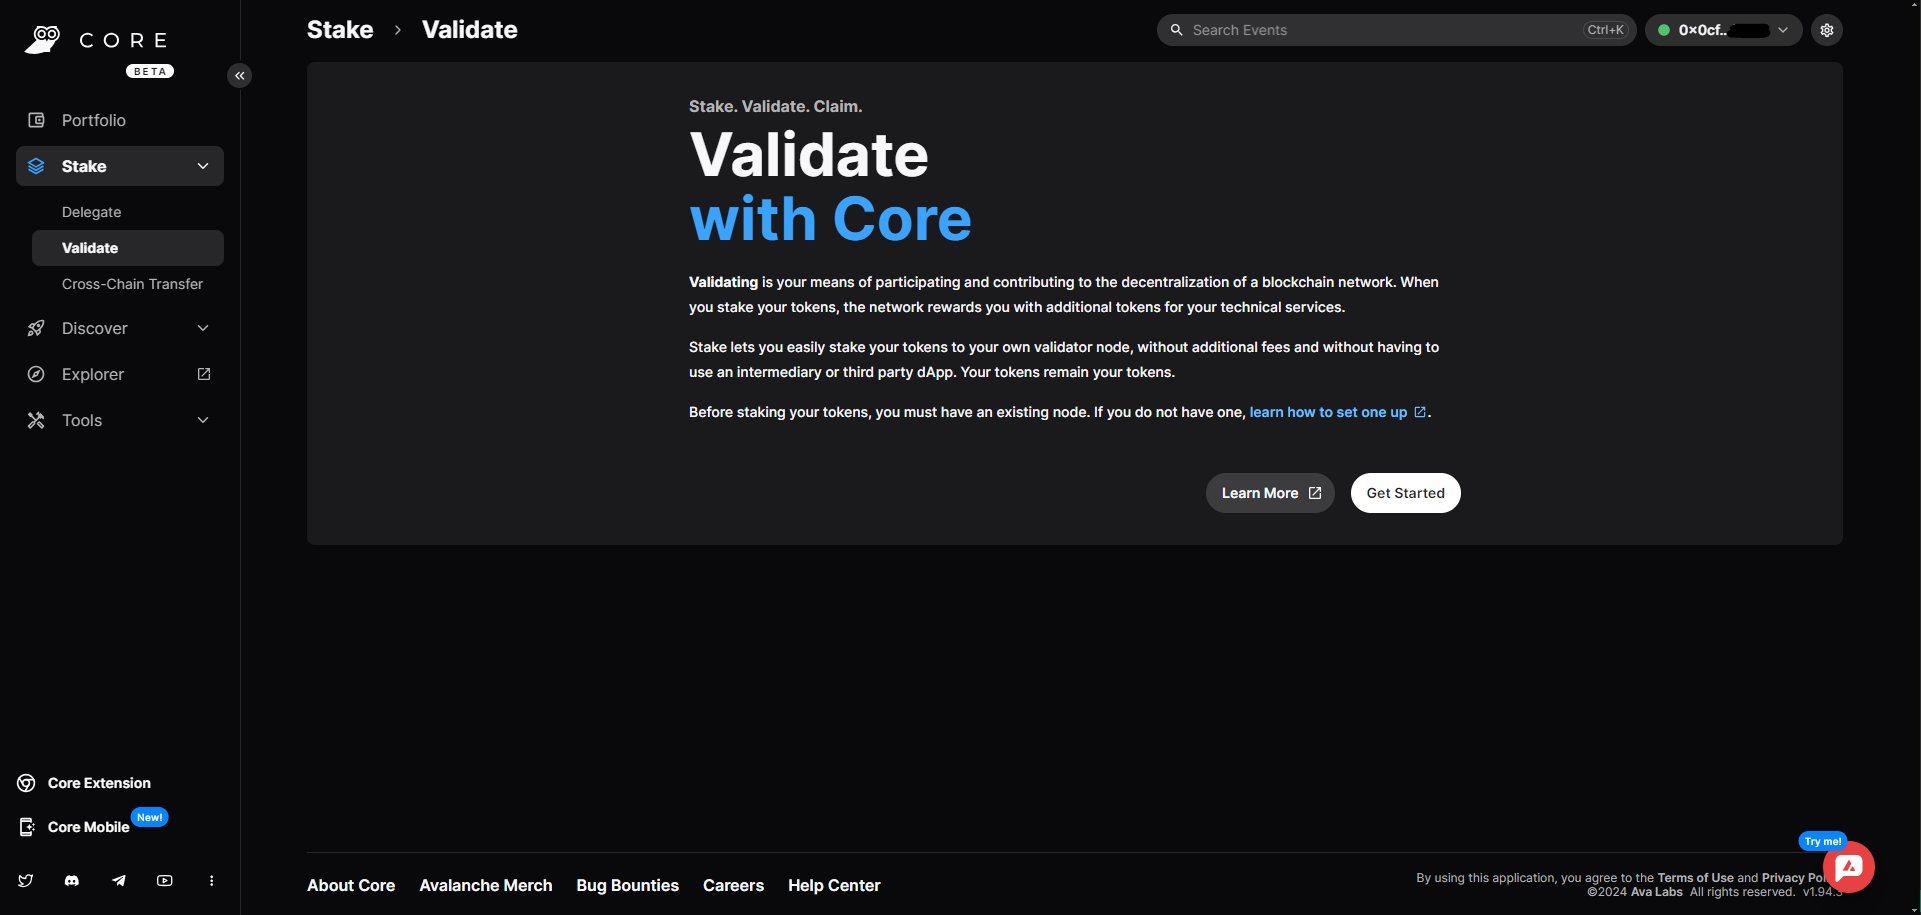
Choosing Avalanche Wallet access will take you directly to the Core Web validate homepage:
The validation tool is only compatible with Core wallets. You will be asked to create a Core wallet to start the validation process. If you do not have one, you can check the tutorial to create one here.
Connect to the right network
By default the wallet connects you to the Avalanche Mainnet network. Which is the right one to use for a real validation.
Next.
Transfer the funds needed for staking
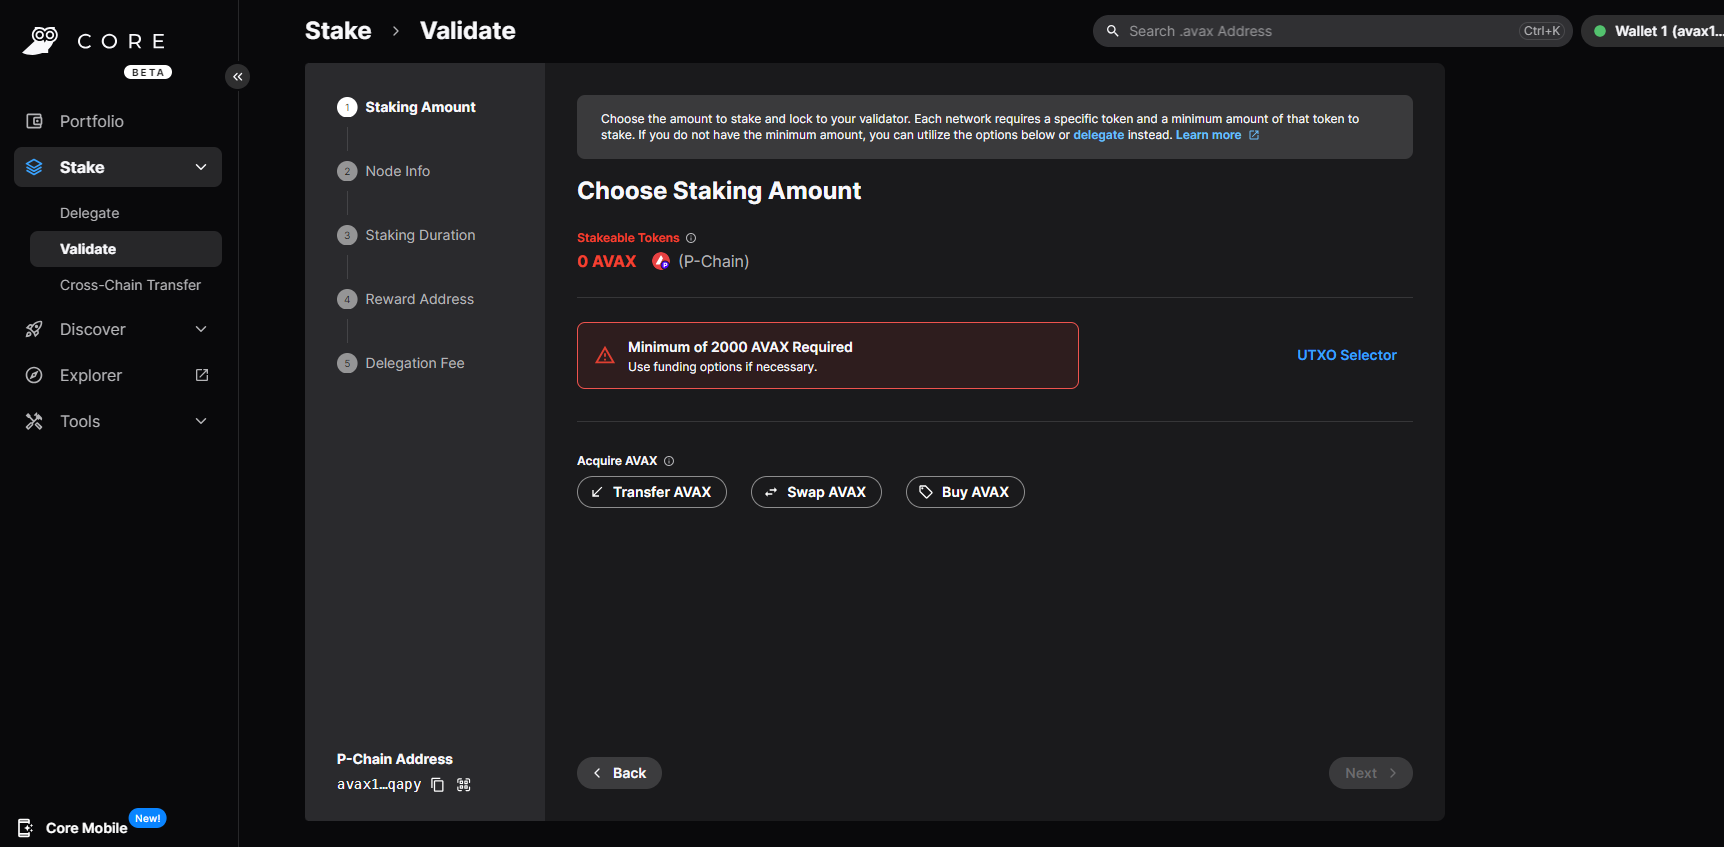
On the Core Web Validate homepage, click on the Get Started button. You enter the validation funnel form:
The Avalanche network is made of three main chains. We will only focus on the C chain (the one used for all interactions with other wallets, like your ledger or browser extension wallets such as Metamask), and the P chain (the one used to store the AVAX stake needed for validation).
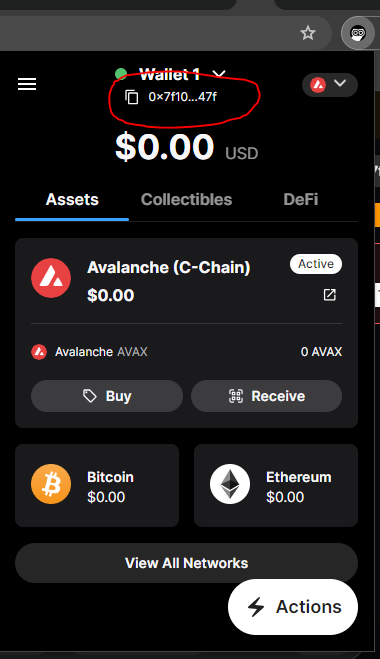
First, get your C-Chain address in your Core Wallet extension.
Transfer funds to C-Chain
Transfer at least 2001 AVAX from the wallet containing your funds.
The minimum stake amount required by the protocol is 2000 AVAX. The additional AVAX allows to deal with the transaction fees needed for the transfer and the activation of the validation.
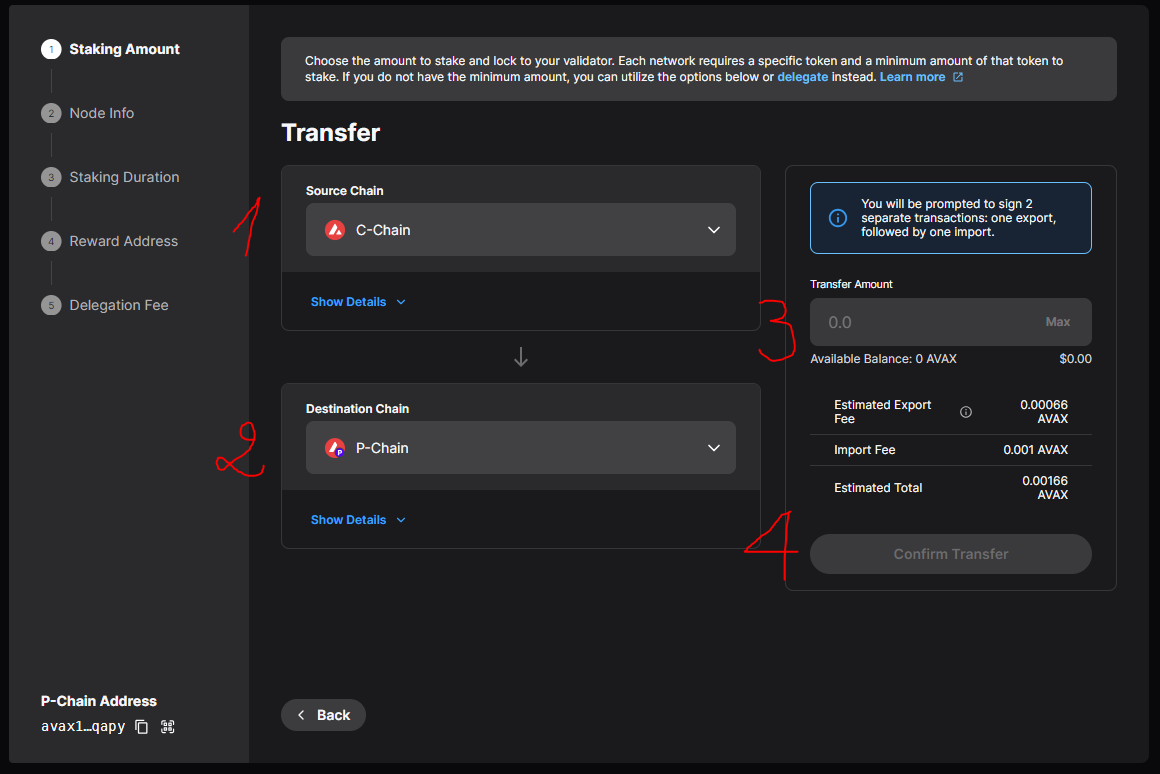
Transfer funds from C-Chain to P-Chain
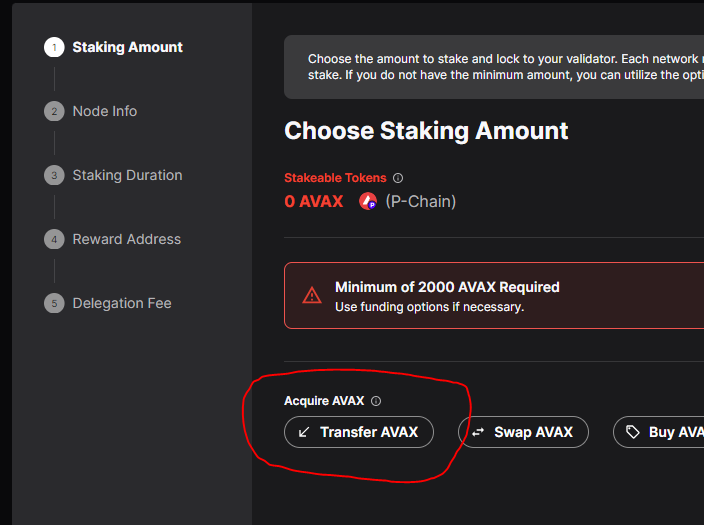
Click on the Transfer AVAX button.
Then:
Source Chain=C-ChainDestination Chain=P-ChainTransfer Amount= whatever you want as long as it is > 2000 AVAX (if the initial balance of your P address is zero).- Click on
Confirm Transfer.
You will be prompted to sign 2 separate transactions: one export, followed by one import.
If your Cross-Chain transfer is interrupted or rejected, you will see a notification at the top of the Cross-Chain Transfer panel indicating so:

By clicking Import, the unclaimed UTXO transaction will be processed, prompting the user to confirm the transaction.
Set up and activate your validation
Access the staking configuration interface
Go back to Validate in the left sidebar, then click on the Get Started button.
Set up your staking amount
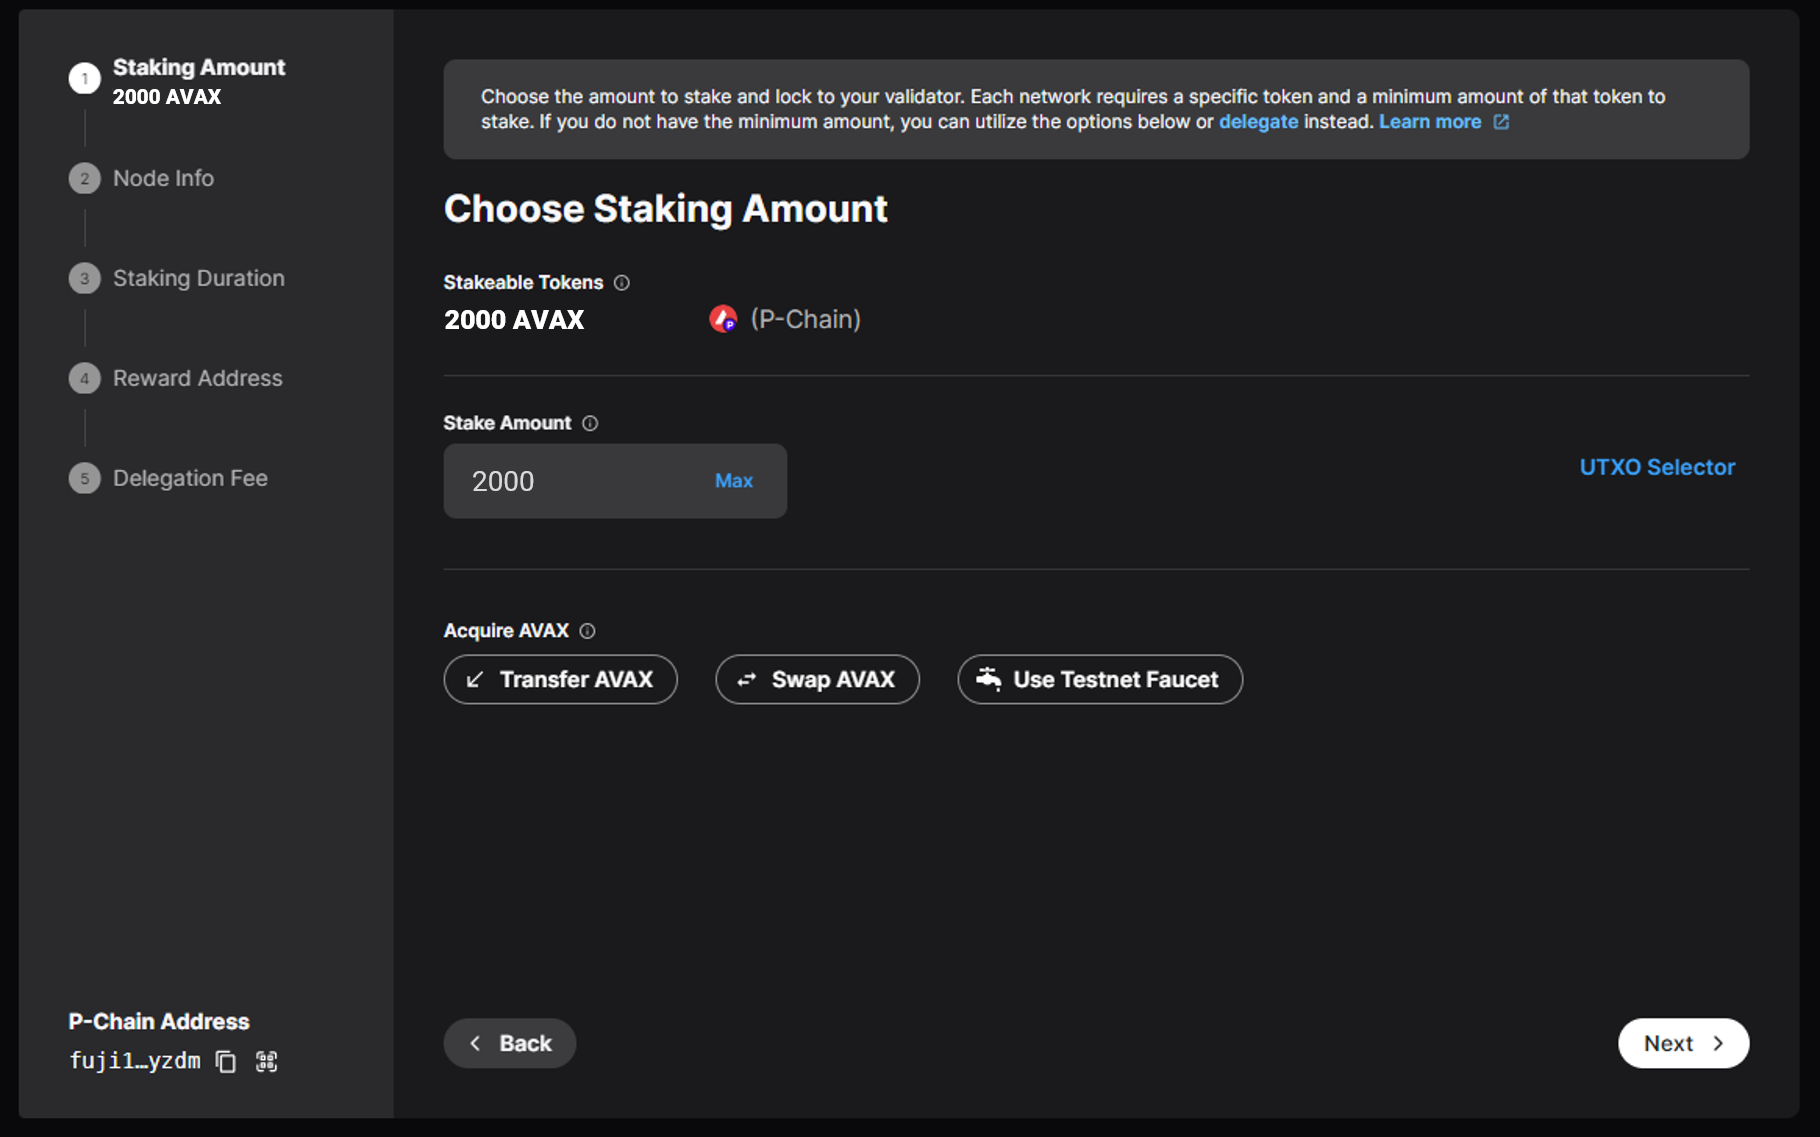
Choose the amount to stake and lock to your validator. The amount of your rewards will be proportional to the amount of your stake.
Click on Next.
Fill in the NodeID details
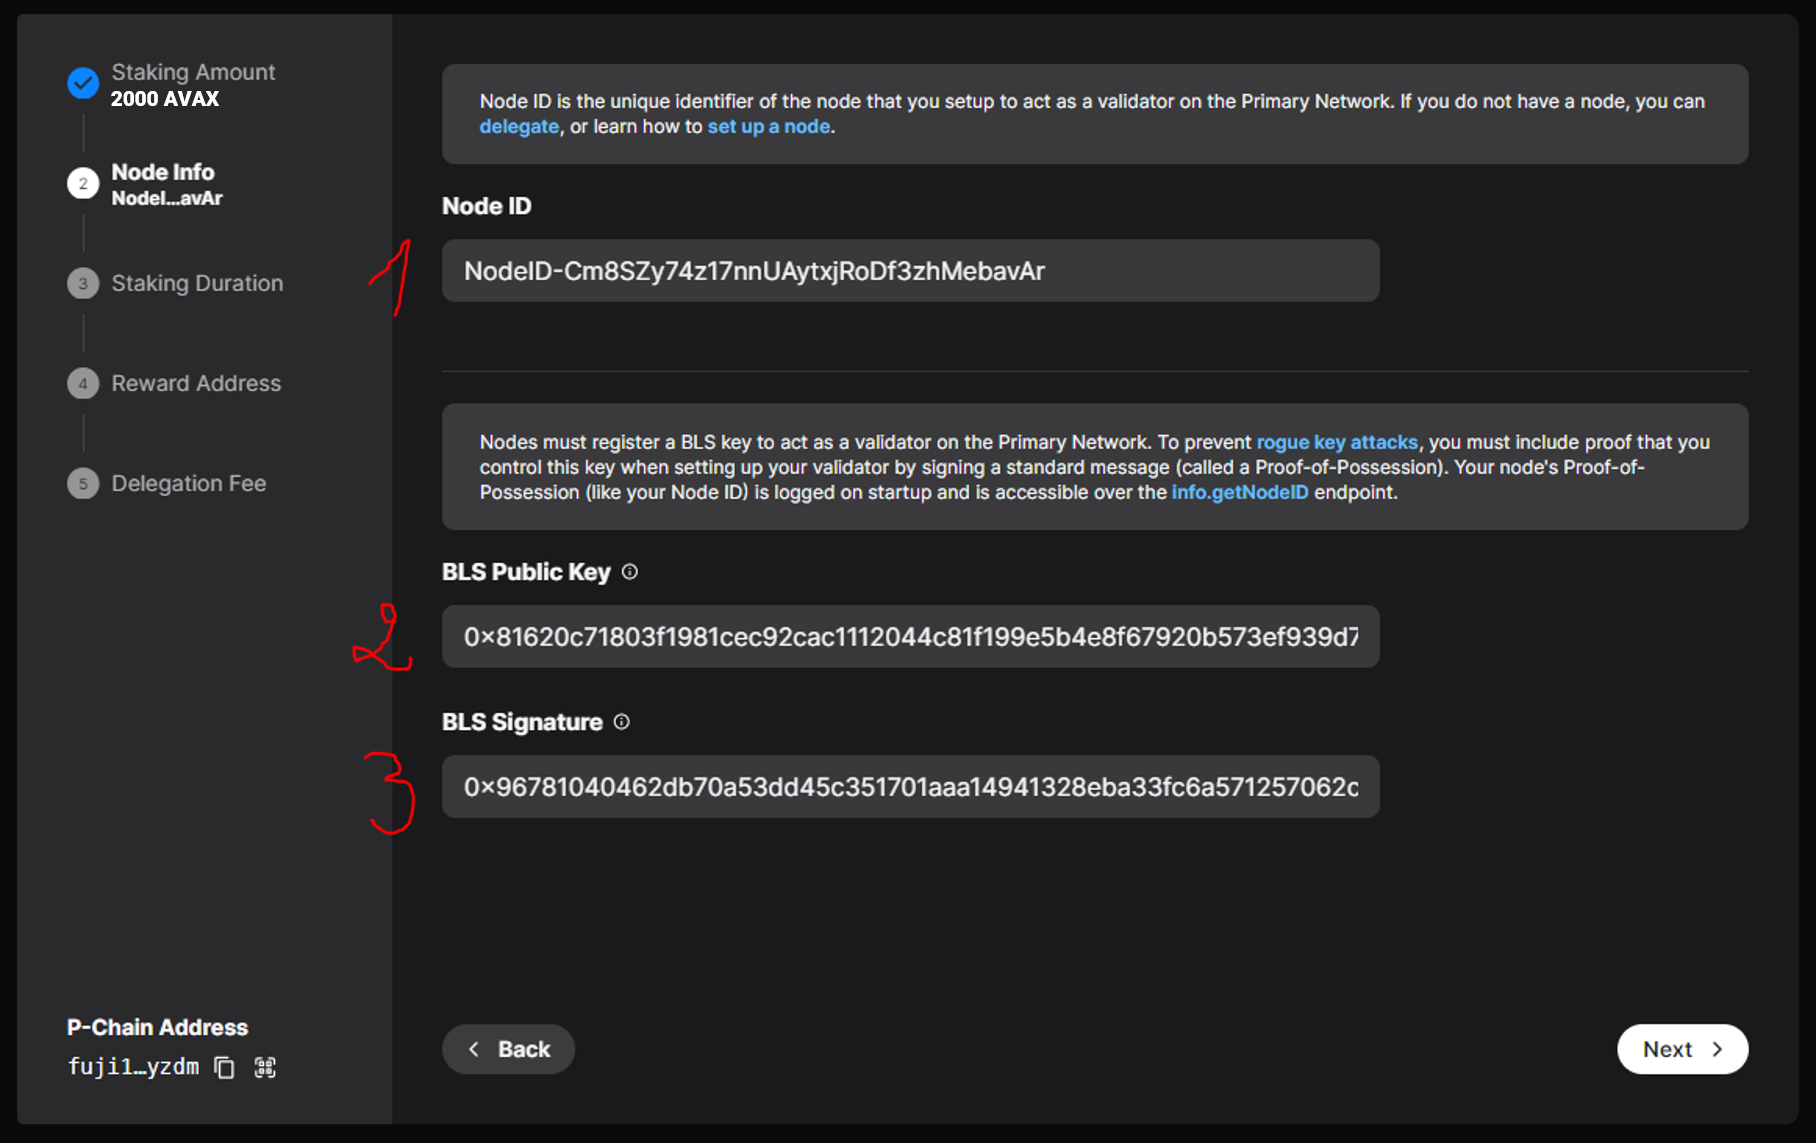
Copy from your ooNodz dashboard and paste:
- your NodeID.
- the corresponding BLS Public Key.
- the corresponding BLS Signature.
Click on Next.
Set up your staking duration
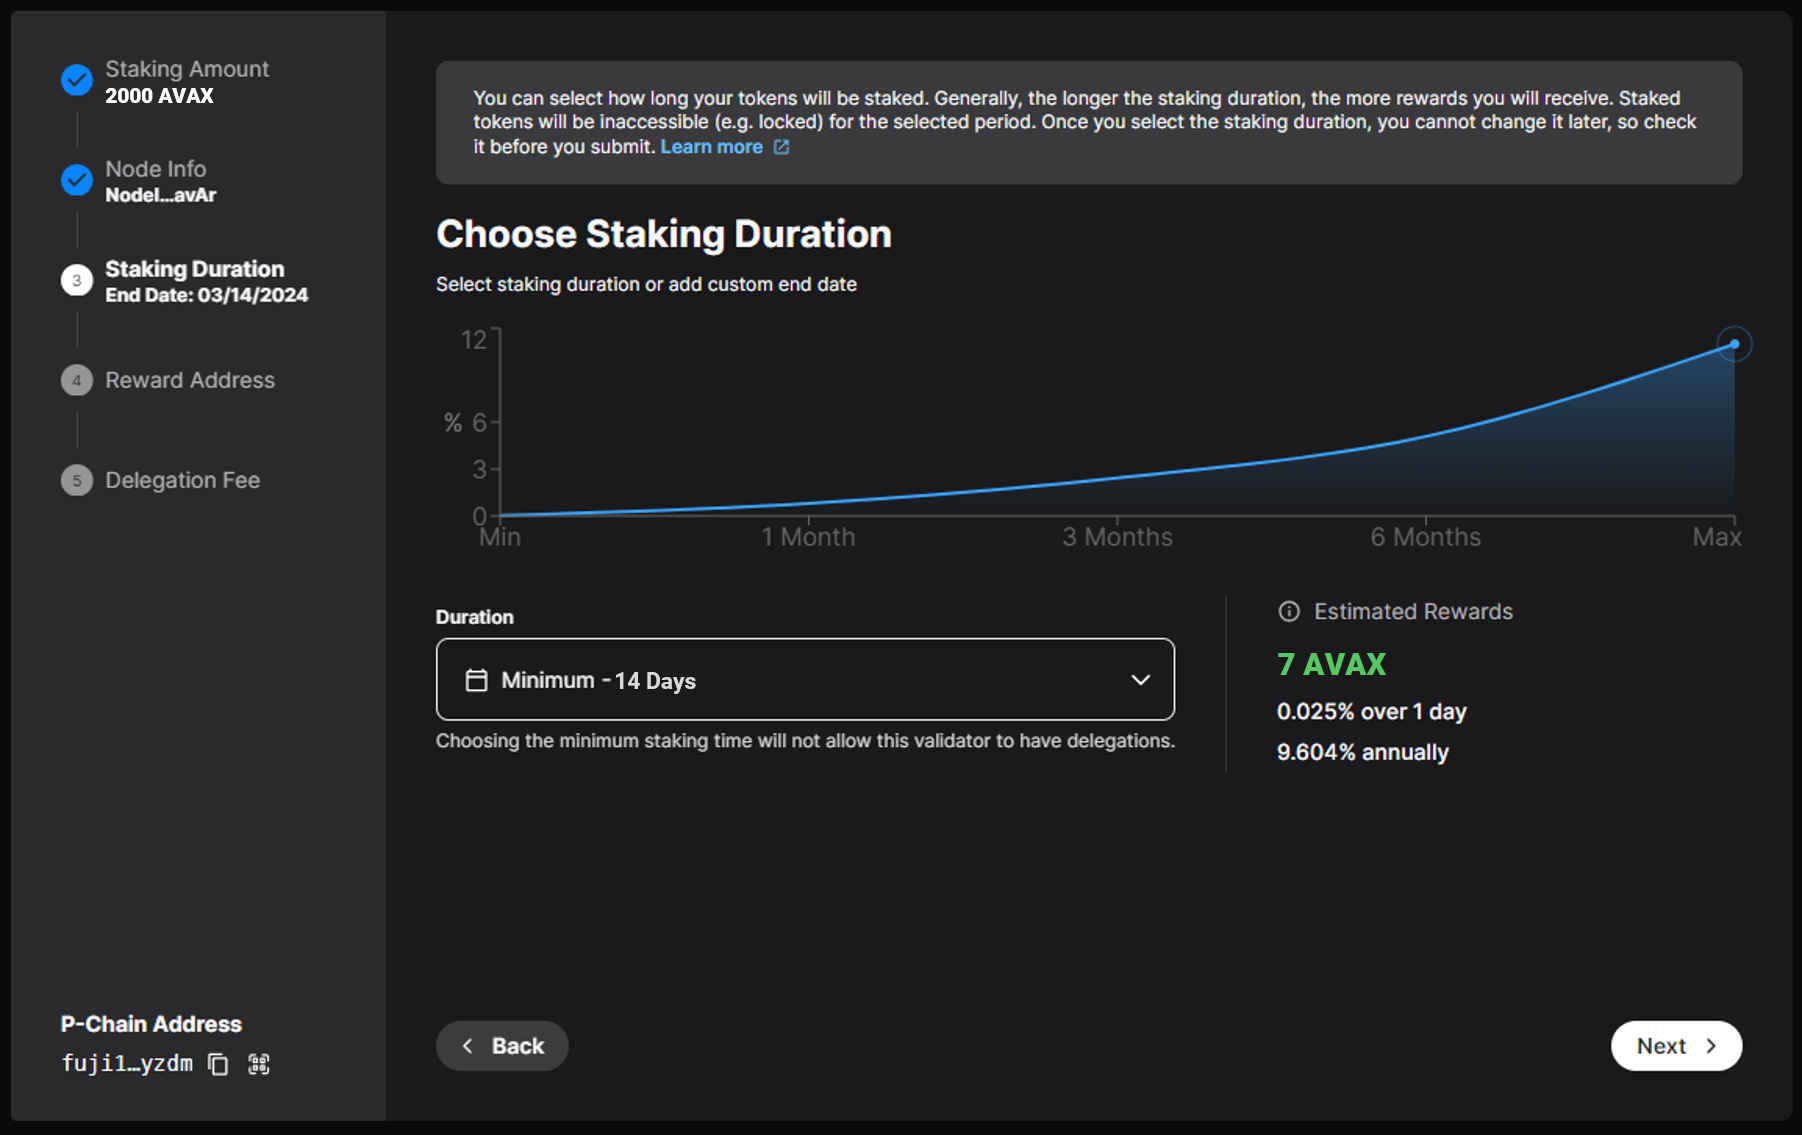
Define a staking end date (minimum 14 days required by the Avalanche protocol).
Generally, the longer the staking duration, the more rewards you will receive. Staked tokens will be inaccessible (e.g. locked) for the selected period.
Click on Next.
Define your reward address
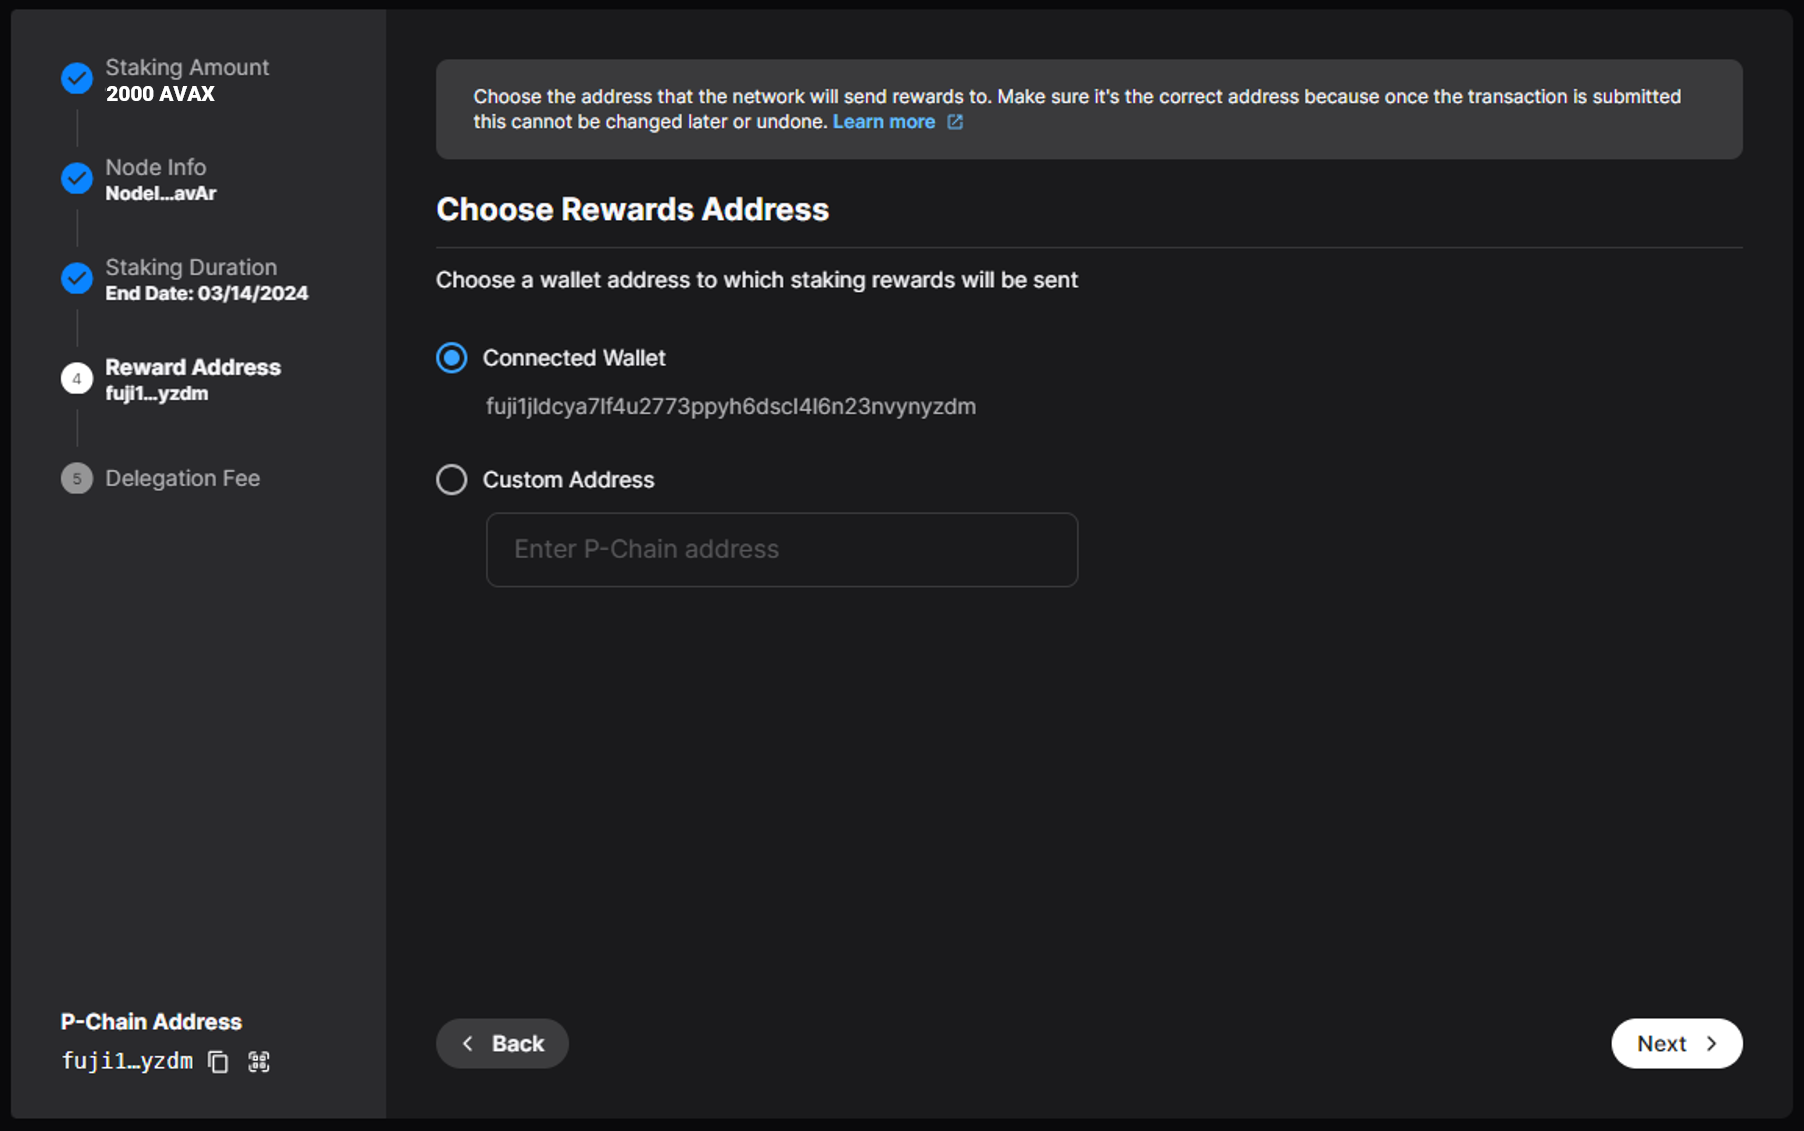
Enter the destination address of your validation rewards here (by default the one you are currently using).
Make sure it's the correct address because once the transaction is submitted this cannot be changed later or undone.
Click on Next.
Set up the delegation fees of
Define the Delegation Fee you want to get from Delegators (the more attractive the rate, the more potential delegations you have, the more fees you earn... benchmark it on Avascan!) Enter the destination address of your delegation rewards here (by default the one you are currently using).
Click on Next.
Submit
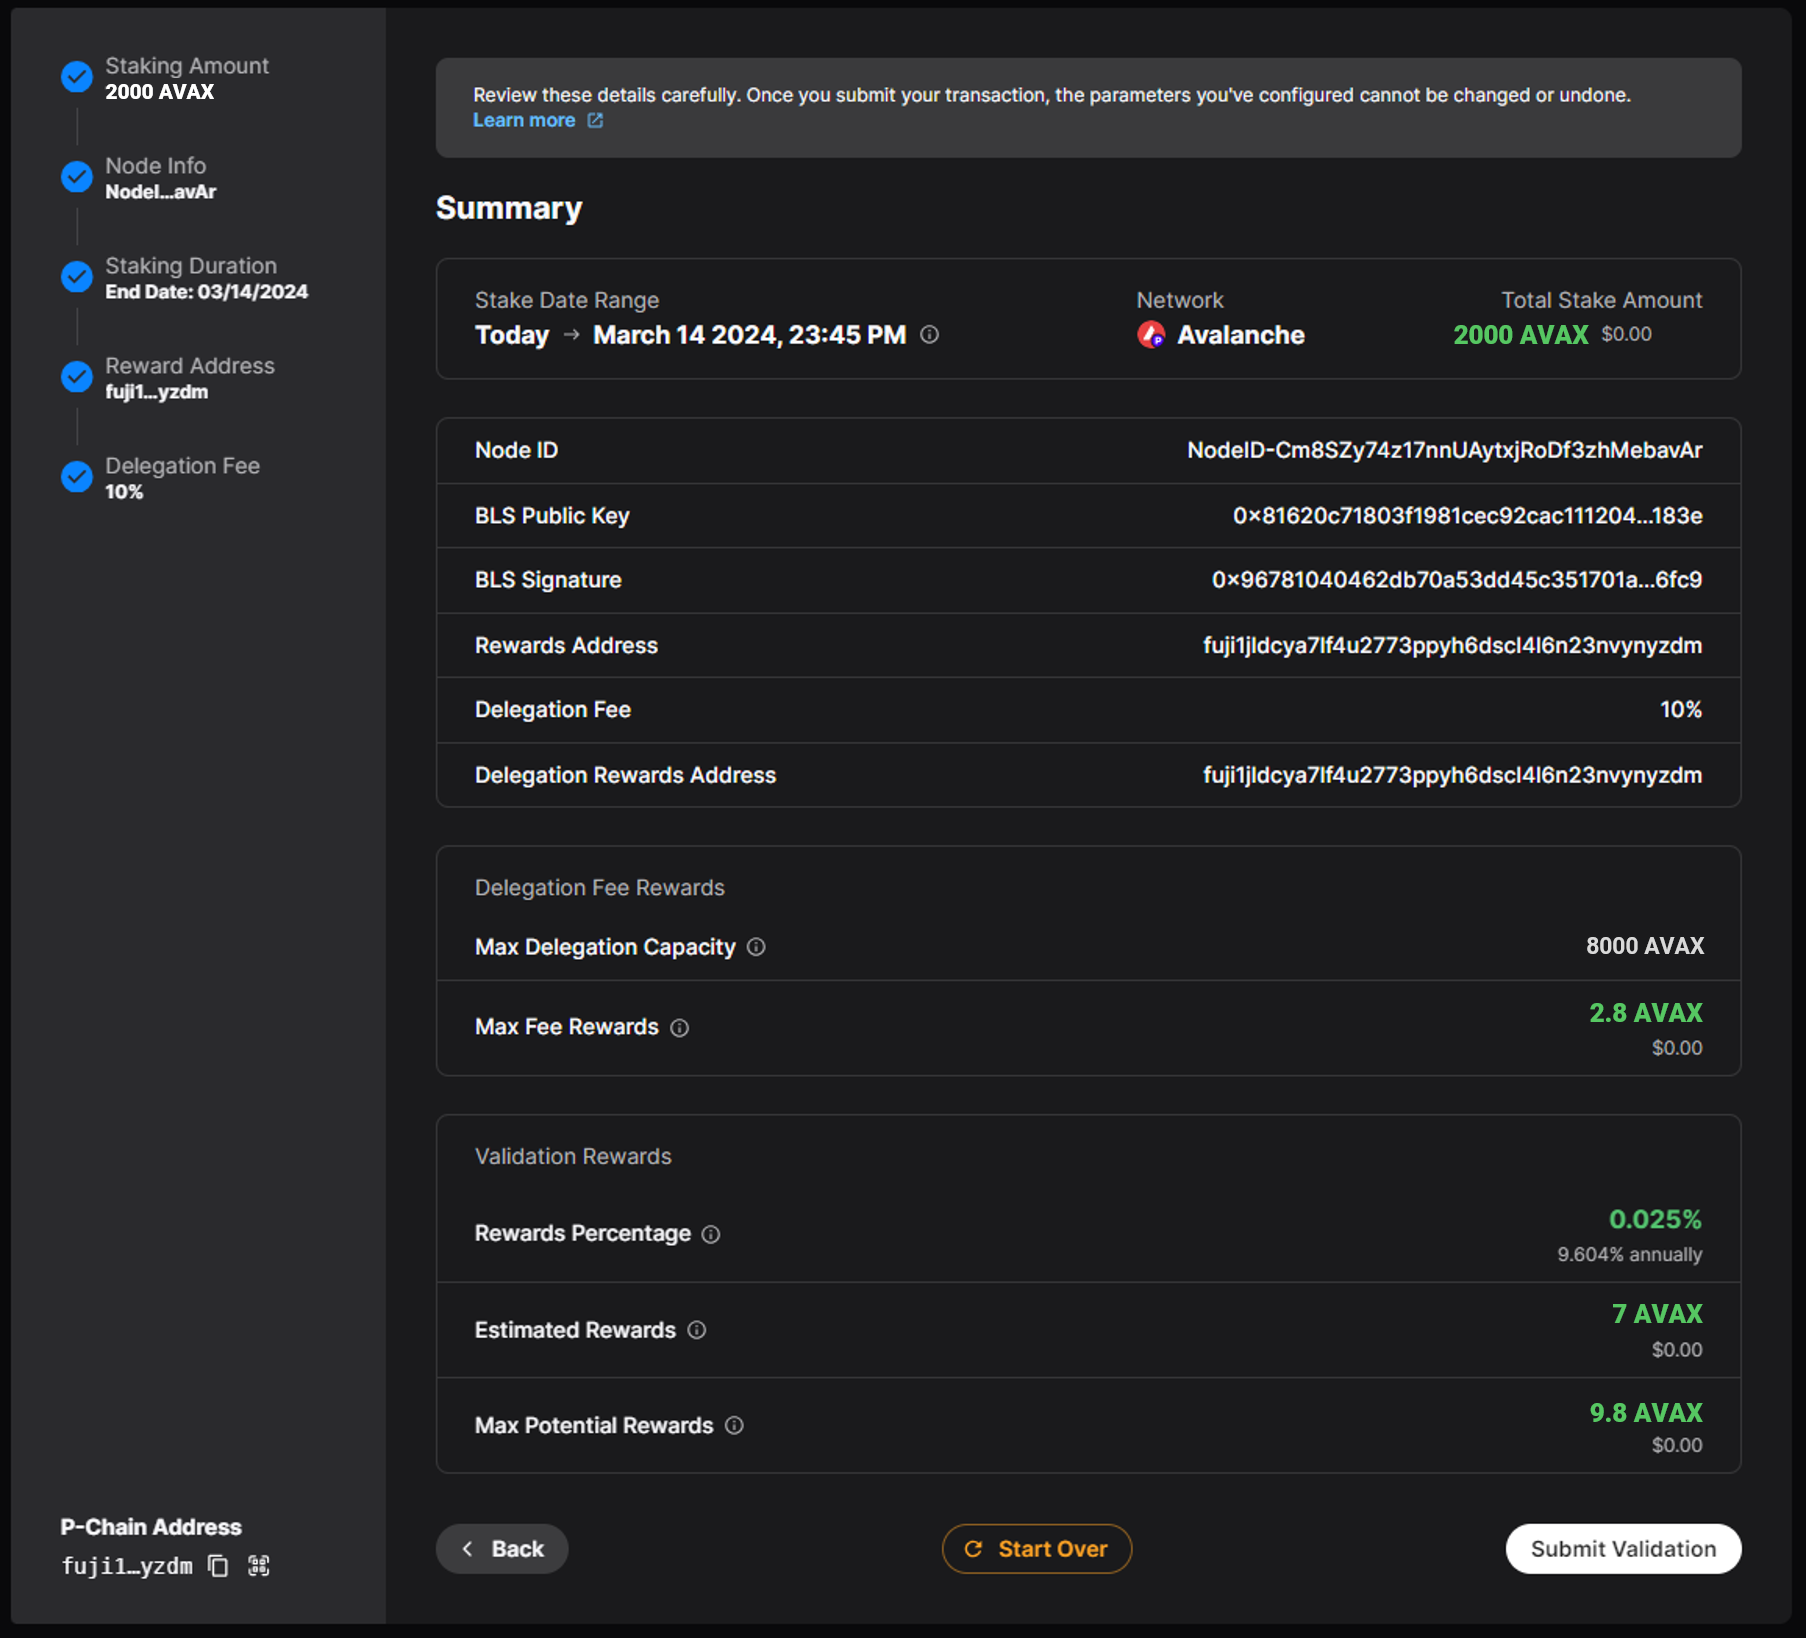
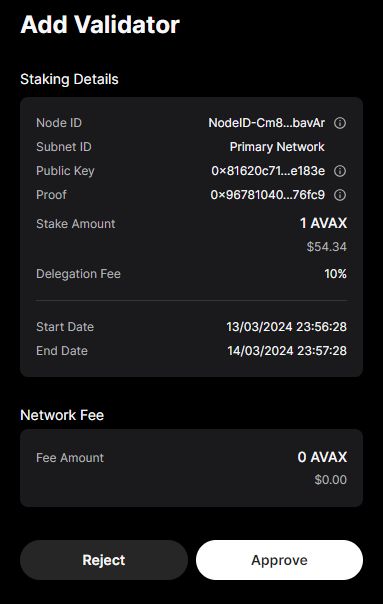
Be sure to double check your inputs, because once submitted it is not possible to cancel the process and change the settings.
Then validate by clicking on the Submit Validation button, and approve the transaction in your Core wallet.
That's it, you are officially a validator of the Avalanche protocol! ...or a validator of the ooNodz Testnet network if applicable.
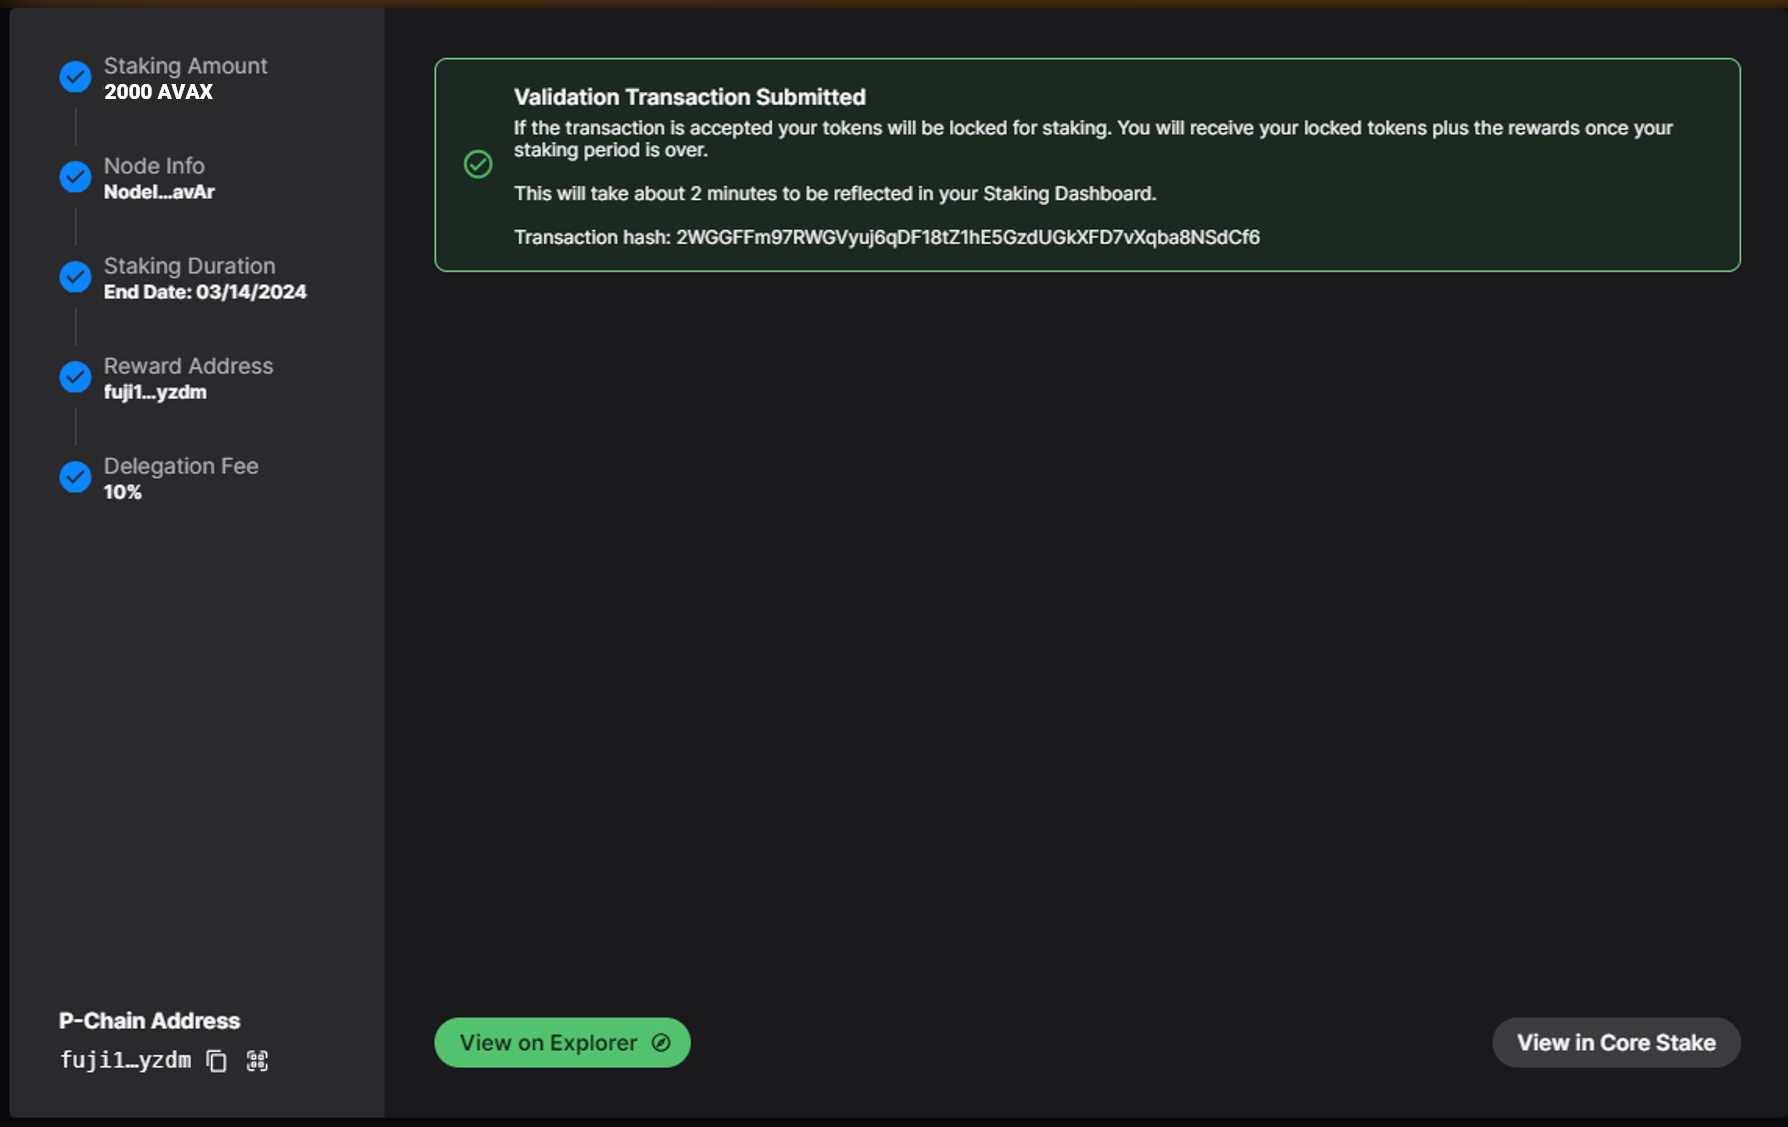
Please note that once your validation is submitted, the avalanche protocol may take several minutes to make it active on the network.
